In this two-part tutorial of TechVentures with Lazina, we’ll explore the STEVAL-ROBKIT1 robotics evaluation kit from STMicroelectronics.
Join Lazina on this episode (part 1) as she guides you through the unboxing and assembly of the kit step by step, covering the main board, motor control board, and imaging board, all powered by the STM32H7 MCU!
Whether you’re into embedded systems, robotics, or just curious about hands-on tech, this kit is a fun way to explore motion control, wireless connectivity, and even vision-based applications.
See the video above or read the full transcript below.
Toggle transcript
Join me on this episode to learn how to build and operate the ST Microelectronics Robot evaluation kit! The kit features a camera module, sensors, wireless connectivity, motors and powerful microcontrollers. It’s a great way to explore embedded processing, motion control, and even vision-based applications.
Hi! Welcome back to TechVentures.
My name is Lazina, and I’m a Technical Marketing Engineer at Future Electronics.
If you are interested in checking out any previous TechVentures videos, then please feel free to click this link: Techventures video series
I’m so excited for today’s episode of Techventures because… we’re building a robot!
And not just any robot—we’re using a robot kit (List part number on screen STEVAL-ROBKIT1) from STMicroelectronics. It’s a fully functional evaluation kit packed with motors, wheels, a camera module, a motor control board, and a powerful main processor board that leaves room for future upgrades.
So grab your screwdriver and let’s get started!
First up in the box:
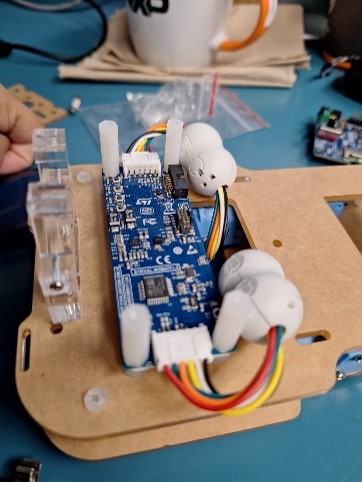
We have the main board (List part on screen STEVAL-ROBOTKIT1). This is the brain of our robot. It’s powered by the STM32H7 microcontroller, and it handles coordination between all the different components. It connects to motion sensors on board like:
- an IMU (Inertial Measurement Unit), which gives us data on acceleration and angular velocity, this is critical for navigation and stability.
- a magnetometer, which reads the magnetic field around the robot for directional awareness.
- We also have a MEMS microphone onboard to capture audio, making the robot a bit more interactive.
And for wireless communication, there’s a Bluetooth Low Energy module (BLUENRG-M2SA), which connects to a mobile app.

Next up, we have the motor board (List part on screen STEVAL-ROBOTKIT1-2).
This board handles all things to do with movement. It’s powered by an STM32G07 microcontroller and uses motor drivers to control the speed and direction of the robot. Just like the main board, it also includes an IMU sensor, which continuously sends motion data to help with real-time motor control adjustments and overall stability.

Next in the box, we have an imaging board, which let’s the robot see and respond to its surroundings. It includes: a camera module, and a time of flight sensor ( VL53L8CX).

Now, for the rest of the box:
- A battery pack (you’ll need 4 AA batteries, not included)
- Two DC motors
- Spacers and screws
- A bunch of cables:
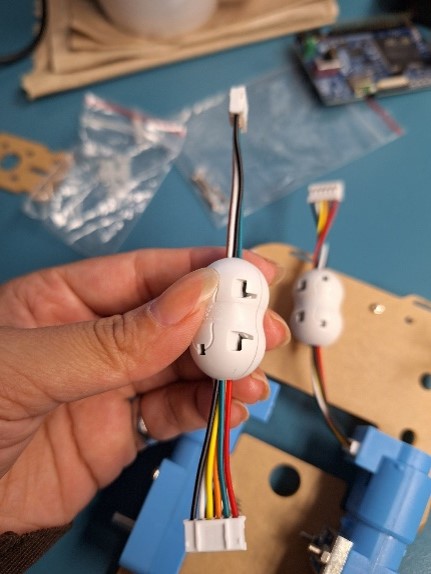
- Motor cables with ferrite cores
- Flat ribbon cables for the debugger and board-to-board connections
- Mounting hardware for the camera
- And of course, the top and bottom chassis, plus two wheels to bring our robot to life!
Alright, let’s get building!
Step 1: Start by attaching the metal brace to the blue motor driver board using the long screw and nut.

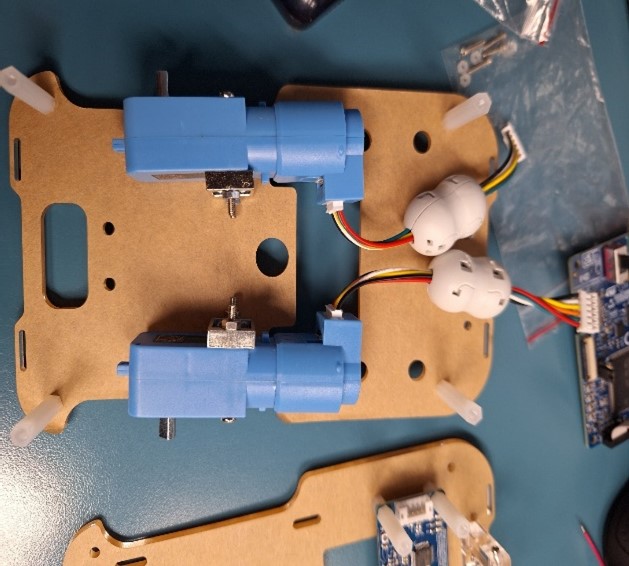
Step 2: Next, screw the motors onto the bottom chassis. Don’t forget to remove the stickers first! Orientation matters: the metal shafts should face outward; this is where the wheels will attach later. Insert the screws from underneath the board.


Step 3: Now, attach the free wheel. We need to unscrew the screws on the wheel, and then screw them back onto attach them to the bottom of the chassis

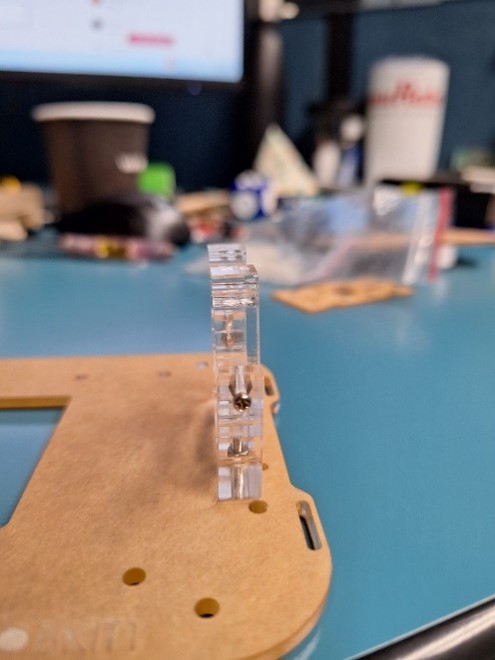
Step 4: next, grab the top chassis and screw in the larger acrylic support bracket.
Insert the screws from the bottom and fasten them with nuts on top.

Step 5: Mount the smaller acrylic bracket on top of that. There’s a recessed area for the nut—drop it in, then secure the bracket with a screw from above.

Step 6: add these plastic screws near the bracket for the camera.


Step 7: Carefully place the motor control board onto those 4 plastic screws we just installed.

Step 8: Now screw in the 20 mm spacers on top of the motor control board, this will be used to support the MCU board in a few steps.


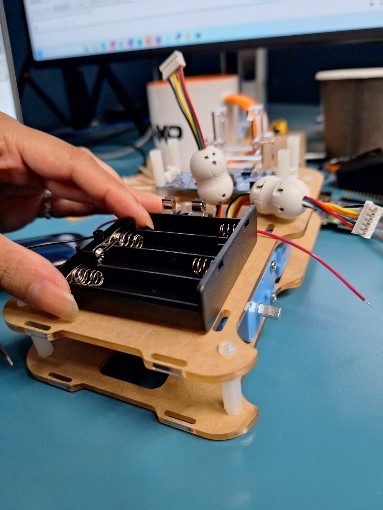
Step 9: Mount the battery holder and fuse support. You can use double-sided tape to hold them in place.

Step 10: let’s turn our attention back to the bottom chassis with the motor drivers, which we have prepared earlier in step 2, this will be the bottom layer, and secure the 25 mm spacers using nylon screws.


Step 11: Attach the ferrite cores to the motor cables. Next, attach the cable between the motor and the motor control board. Assemble both chassis together. Secure with a screw.


Step 12: Connect the flat ribbon cable from the MCU board to the motor board.

Step 13: Place the MCU board on top of the motor control board. Secure it using the nylon screws, then connect the motor control board to the MCU using the flat cable.


Step 14: Time for the fun part! Attach the wheels onto the motor shafts.


Step 15: install the fuse in the battery holder

Step 16: Hook up the power supply wires, red wire on the left, and the black wire on the right.

Step 17: Mount the image sensor board onto the MCU board. Make sure the blue side of the MIPI ribbon cable is facing up. Secure the board to the bracket with screws.


Step 18: Finally, download the companion mobile app to start interacting with your robot!


And that’s it, our robot is fully assembled and ready to roll!
In Part 2, we’ll power it up, connect it to the accompanying mobile app, and I’ll show you how to control it, monitor real-time data, and even go for a little test drive!
So don’t forget to like, subscribe, and hit that notification bell so you don’t miss the next episode. Thanks for building with me today—see you in Part 2 of Techventures with Lazina!
If you’d like more information, please feel free to reach out to your local Future Electronics representative or visit us online at futureelectronics.com.
Thanks for watching, and I’ll catch you next time on Techventures with Lazina!